Cashless Claim Process Explained (Step-by-Step Guide)
Table of Contents
Learn how cashless claim Process work with our detailed step-by-step guide. Understand pre-authorization, network hospitals, and avoid claim rejection easily.
Let’s be honest medical emergencies are scary enough without having to worry about arranging large sums of money on short notice. You are already dealing with stress, anxiety, and uncertainty about your loved one’s health. The last thing you need is to run from pillar to post, trying to gather funds for hospital bills.
This is precisely where cashless health insurance claims become your financial safety net. When you have a health insurance policy that offers cashless treatment, your insurer settles the hospital bills directly with the hospital. You walk out paying only for what’s not covered under your policy no massive upfront payments, no scrambling for loans.
But here’s the catch. despite cashless claims being one of the most valuable features of health insurance, most policyholders don’t fully understand how the process works. They are confused about when they can use it, what documents they need, or why their claim might get rejected.
If you have ever wondered how exactly cashless claims function or felt unsure about the steps involved, you are in the right place. This comprehensive guide breaks down the entire cashless claim process in simple, easy to understand language. By the end, you’ll know exactly what to do when a medical situation arises, ensuring you make the most of your health insurance coverage.
What Is a Cashless Health Insurance Claim?
Before diving into the process, let’s understand what we mean by a cashless claim.
A cashless health insurance claim is a facility that allows you to receive medical treatment at a network hospital without paying the hospital bill upfront. Instead of you paying first and then claiming reimbursement later, the insurance company directly settles the approved medical expenses with the hospital.
The hospital’s billing department coordinates directly with either your insurance company or their Third Party Administrator (TPA). Once your treatment gets approved, the insurer pays the hospital as per your policy terms and coverage limits.
Does this mean everything is completely free. Not quite. You’ll still need to pay for certain things like deductibles, co-payments (your share of the bill), room upgrades beyond policy limits, or items specifically excluded from your coverage. But the bulk of your covered medical expenses gets handled without you having to arrange the money.
When Can You Actually Use the Cashless Claim Facility?
Understanding when you can use cashless claims is crucial. There are two primary situations where this facility comes into play:
1. Planned Hospitalization
This covers medical situations you can schedule in advance. Think of surgeries that aren’t urgent, planned deliveries, or diagnostic procedures that require hospital admission.
Common examples include elective surgeries like knee replacement, cataract operations, scheduled caesarean deliveries, or planned cardiac procedures.
The key requirement here is pre-authorisation you must get approval from your insurer before getting admitted to the hospital. This typically needs to be done at least 48 to 72 hours before your scheduled admission.
2. Emergency Hospitalization
These are unplanned medical situations that require immediate hospital admission. You can’t predict when these will happen, and there’s no time to get prior approval.
Examples include accidents, sudden heart attacks, strokes, severe injuries, acute illnesses, or any critical condition requiring urgent medical attention.
For emergency hospitalisation, you must inform your insurer or TPA within 24 hours of hospital admission. This is critical missing this deadline could complicate your claim process.
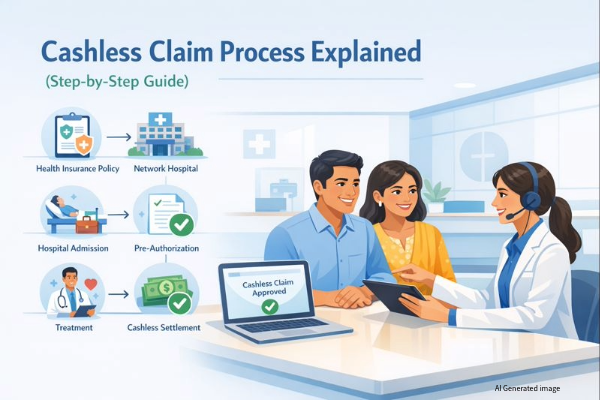
The Complete Step-by-Step Cashless Claim Process
Now let’s walk through exactly how cashless claims work from start to finish. Understanding each step will help you navigate the process smoothly when you need it most.
Step 1: Choose a Network Hospital
This is the foundational requirement for cashless claims. You can only avail cashless treatment at hospitals that have a tie-up with your insurance company. These are called network hospitals.
Before rushing to any hospital, especially in planned hospitalisation scenarios, take a few minutes to verify that the hospital is in your insurer’s network. You can check this on your insurance company’s website, mobile app, or by calling their customer service helpline.
Also verify that your policy is currently active with all premiums paid up to date, and check if any waiting periods for specific treatments have been completed. Most policies have initial waiting periods and specific waiting times for certain diseases or procedures.
Pro Tip: Always keep a digital copy of your e-health card saved on your smartphone. In emergencies, you might not have time to search for physical documents, but your phone is usually with you.
Step 2: Inform the Insurance Desk at the Hospital
Once you arrive at the network hospital for admission, head to the hospital’s insurance desk or TPA desk. These desks are specifically set up to handle insurance related formalities.
Inform the hospital staff that you want to use your health insurance for cashless treatment. They’ll guide you through their specific process.
You’ll need to provide certain documents at this stage:
- Your health insurance card (physical or digital)
- A valid government-issued photo ID (Aadhaar card, PAN card, driving license, or passport)
- Your health insurance policy number
- Any previous medical records if relevant to the current treatment
The hospital staff will verify your details and begin the cashless claim process on your behalf.
Step 3: Submit the Pre-Authorisation Form
This is where the formal claim process begins. The hospital will fill out a cashless pre-authorisation request form and submit it to your insurance company or their TPA.
This form is essentially a request asking the insurer to approve cashless treatment for you. It contains crucial information including patient details, diagnosis or preliminary findings, proposed treatment plan, estimated treatment costs, and the treating doctor’s signature.
The timing of this submission depends on your situation:
For planned hospitalization5, this form should ideally be submitted 48 to 72 hours before your scheduled admission date. This gives the insurer adequate time to review and approve your case.
For emergency admissions, the form is submitted immediately after you are admitted to the hospital, since there’s no opportunity for advance notice.
Step 4: Insurer Reviews and Approves the Request
Once the pre-authorisation form reaches your insurance company, their claims team reviews it carefully. They are checking several things:
Does your policy cover the proposed treatment. Are you still within any waiting periods. Are there any sub-limits that apply (like room rent limits or disease-specific caps) Is the treatment medically necessary based on the diagnosis.
Based on this evaluation, there are three possible outcomes:
Approved: Your claim gets the green light, either fully or partially based on your policy coverage. Treatment can proceed on a cashless basis.
Query Raised: The insurer needs additional information or clarification. The hospital provides these details, and the approval process continues.
Rejected: Your claim doesn’t meet policy terms, with specific reasons provided. You’ll need to pay out of pocket and can later claim reimbursement if applicable.
The approval timeline varies based on urgency. Emergency cases typically get processed within 2 to 6 hours, while planned hospitalisation approvals usually take 24 to 48 hours.
Step 5: Get Treated Without Paying the Bill Upfront
Once you receive approval, you can proceed with your treatment without worrying about arranging money for hospital bills. This is where the true benefit of cashless claims shines through.
Your insurance company will directly pay the hospital for covered expenses including room rent (as per policy limits), doctor consultation fees, nursing charges, ICU or surgery charges, and covered medicines and medical procedures.
However, you’ll still be responsible for paying certain expenses out of pocket:
- Hospital registration or admission charges
- Non-medical expenses like attendant food or phone charges
- Any expenses that exceed your policy limits
- Co-payment percentage if your policy has this clause
- Deductible amount if applicable
- Room rent difference if you choose a room category above your policy limit
Understanding what’s covered and what’s not helps you manage your expectations and budget accordingly.
Step 6: Discharge and Final Settlement
When you are ready for discharge, the hospital’s billing department prepares your final bill. They send this complete bill to your insurance company for final settlement.
The insurer reviews the final bill, approves the covered amount based on your policy terms, and settles that amount directly with the hospital. You pay whatever balance remains typically the non covered items we discussed earlier.
Before leaving the hospital, make sure you collect and safely store these important documents:
- Discharge summary with complete treatment details
- Final itemized hospital bill
- Payment receipts for amounts you paid
- All investigation and diagnostic reports
- Pharmacy bills if applicable
Keep these documents safely. They are useful for tax purposes, future medical reference, or if you need to file for reimbursement of any rejected items later.
Common Reasons Why Cashless Claims Get Rejected
Understanding why claims get rejected helps you avoid these pitfalls. Here are the most common reasons:
Hospital not in network: You went to a hospital that doesn’t have a tie-up with your insurer.
Waiting period not completed: You’re claiming for a treatment that’s still under your policy’s waiting period.
Policy lapsed: Your policy isn’t active because premiums weren’t paid on time.
Non-disclosure: You didn’t inform the insurer about pre-existing diseases when buying the policy.
Treatment not covered: The procedure or condition isn’t covered under your specific policy terms.
Sub-limit exceeded: You exceeded room rent limits or disease-specific caps mentioned in your policy.
Cashless Claim vs Reimbursement Claim: Understanding the Difference
It’s important to know how cashless claims differ from reimbursement claims:
With cashless claims, your insurer pays the hospital directly, you can only use network hospitals, it’s highly convenient with minimal paperwork, and you don’t need to arrange large sums of money.
With reimbursement claims, you pay the hospital first from your pocket, you can go to any hospital (even non-network), you need to submit extensive documentation later, and you wait for the insurer to process and reimburse your claim.
Tips to Ensure Smooth Cashless Claims
Want to make sure your cashless claim goes through smoothly? Follow these practical tips:
Choose a health insurance policy with a large network of hospitals in your area. More options mean better chances of finding quality care nearby.
Always disclose your complete medical history honestly when purchasing the policy. Non-disclosure is one of the top reasons for claim rejection.
Understand your policy’s room rent limits and disease-specific sub-limits. This helps you choose appropriate room categories and avoid paying large differences.
In emergency situations, inform your insurer or TPA immediately—definitely within 24 hours of admission.
Keep your policy active by paying premiums on time. Set up auto-debit or reminders so you never miss a payment.
Carry your e-health card details on your phone and keep a physical copy in your wallet or purse.
Final Thoughts
A cashless health insurance claim can be an absolute game-changer during medical emergencies, dramatically reducing your financial stress when you need to focus on health and recovery. But this benefit only works effectively when you understand the process inside out.
Knowing the step-by-step cashless claim process, understanding your coverage conditions, being aware of exclusions and sub-limits, and following the right procedures ensures you’re fully prepared when a medical situation arises.
Remember, health insurance isn’t just about buying a policy and forgetting about it. The real value comes from knowing how to use it correctly when it matters most. Take time to read your policy document, understand what’s covered and what’s not, keep your documents organized, and know the process before you need it.
Your health insurance is there to protect you financially during medical crises. Make sure you’re equipped to make the most of it.